Category: How To

  • Flu Vaccine Advocate or Opponent? Use This Checklist

    Flu Vaccine Advocate or Opponent? Use This Checklist

    Las Vegas Flu Vaccine For Your Home

    It’s that time of year again in Las Vegas…the weather cools off, air gets drier, lips get chapped, schools are back in session and your child gets sick. Sometimes illnesses like the flu can spread through a class or school or office very quickly. No matter if you are an advocate or opponent of the flu vaccine, to protect your family, I’ve listed several items and areas to clean and sanitize in your home life and help reduce the chances of getting sick. Consider it a kind of flu vaccine for your home.

    I’ve categorized what to clean by which appliances or tools to use. This may help you lump tasks together, speeding up the time to completion. The categories are: Dishwasher, Spray & Wipe, Washer/dryer and Other Tools.

    Remember to use natural cleaners since they work and won’t have lasting negative side effects. Cleaners like probiotics or vinegar work well. Microfiber should be used wherever possible. If you have anything to add to the list feel free to comment below. Happy cleaning!


    Clean Like A Vaccine

    Dishwasher

    The dishwasher can use hotter water than what you can handle yourself. This helps in sanitizing hard surfaces like blocks and legos not just your dishes:

    • blocks/legos
    • cupholders from car seats or strollers
    • action figures
    • other hard surfaces that can handle heat and water


    Spray & Wipe

    I recommend a probiotic cleaner since it works better than chemicals, is all natural, organic, hypoallergenic and reduces ATP for several days. You really want to get areas where your child would touch often. It’s important here to think or see on a child’s level. Literally get down to their level and think about what you might touch to hoist yourself up onto something or swing from.

    • car door handles – where your child would grab to get in.
    • back of front seats – where your child would kick or place their feet.
    • door knobs and rails
    • cell phones and tablets
    • remote controls
    • refrigerator door and handles
    • countertops
    • tabletops
    • chairs – where people would grab to move it out to sit in.
    • trashcan including lid
    • bathroom sink and faucet handles
    • toilet handles and seats


    Washer/Dryer

    Your washing machine can do a great job of cleaning things that are used everyday, but not thought of as needing to be cleaned (everything needs to be cleaned). A mild, plant-based detergent is enough for all jobs. I recommend to hang or air dry most items so they don’t shrink or lose too much of their form. Besides the sun’s rays will help disinfect and deodorize naturally:

    • backpack
    • lunchbag
    • shoes
    • sheets
    • sofa or couch – depending on material and configuration you may unzip the cushion cover and place in the wash then hang to dry.
    • toys – depending on the material


    Other Tools Required:

    • child car seat – steam clean first, then probiotic spray & wipe with microfiber cloth.
    • carpet – use a HEPA filter vacuum to avoid spewing allergens into the air. Allergens can wreak havoc on your immune system weakening it for more sinister germs to infect.
    • floor – mop with probiotic cleaner and a microfiber mop head. Be cautious to change the pads often to avoid cross-room contamination.

    This post took some time to create. If you found it helpful, please like it, share it and click on something else that may interest you like another post or ad you saw.

  • Vacuuming for Health

    Vacuuming for Health

    Vacuuming for Health: An Easy To Follow Guide

    Vacuuming is one of the most important things you can do for your health. By removing dust, dead skin cells, pet dander and other allergens, vacuuming makes it possible for you to breathe easier, rest better and even boost your immune system.

    Below is a step-by-step guide to vacuuming like a pro. Be sure to watch the video too. I hope you employ these tips the next time you vacuum.

    The keys to vacuuming are to develop your own methodical system so no area goes unvacuumed and to use all the tools at your disposal.


    (adsbygoogle = window.adsbygoogle || []).push({});

    Once you have your system down, you’ll notice your vacuuming time dwindle.

    Save time and produce a healthier environment by vacuuming like a pro
    Save time and produce a healthier environment by vacuuming like a pro.

    For instance, when I vacuum a room, I start with the edges of the room first. I’ll take my crevice tool, go around the room–vacuuming all the tight spaces as I go along. That way I won’t have to pull out the same tool later in my process, slowing me down.

    One of the most important yet rarely used tools on the vacuum is the crevice tool.
    One of the most important yet rarely used tools on the vacuum is the crevice tool.


    (adsbygoogle = window.adsbygoogle || []).push({});

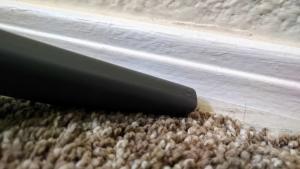
    The crevice tool makes it possible for you to vacuum between the floor and baseboard or wall.

    The crevice tool also helps get into those small or tight areas like between your fridge and cabinets or behind your entertainment center.
    The crevice tool also helps get into those small or tight areas like between your fridge and cabinets or behind your entertainment center.


    (adsbygoogle = window.adsbygoogle || []).push({});

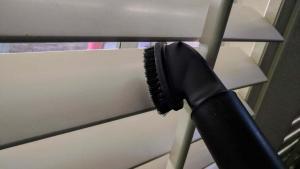
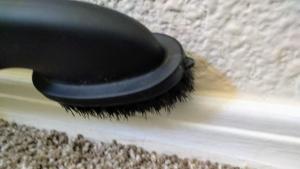
    Next, I’ll take the brush attachment and use it to vacuum blinds, around windows, baseboards, vent registers and other items whose surface can take gentle abrasion.

    Use the brush attachment to vacuum your blinds.
    Use the brush attachment to vacuum your blinds.


    (adsbygoogle = window.adsbygoogle || []).push({});

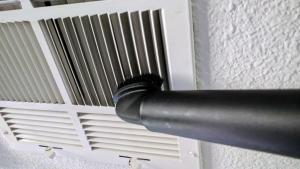
    Use the brush attachment to vacuum vent registers too.
    Use the brush attachment to vacuum vent registers too.


    (adsbygoogle = window.adsbygoogle || []).push({});

    Vacuum your base boards with the brush attachment.
    Vacuum your base boards with the brush attachment.


    (adsbygoogle = window.adsbygoogle || []).push({});

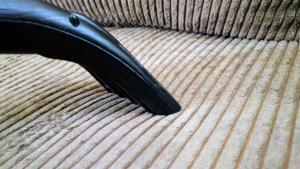
    From there, I’ll use the upholstery attachment to vacuum things like the sofa and mattresses.

    The upholstery attachment is useful for the sofa or soft, pillowy-type surfaces.
    The upholstery attachment is useful for the sofa or soft, pillowy-type surfaces.


    (adsbygoogle = window.adsbygoogle || []).push({});

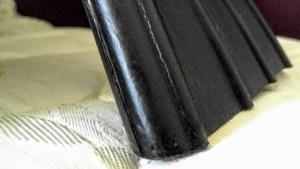
    Vacuuming the sofa and mattress with an upholstery attachment to remove all those dead skin cells left behind really makes a difference in allergy relief.

    When you have sheets in the wash, it is a perfect time to vacuum your mattress.
    When you have sheets in the wash, it is a perfect time to vacuum your mattress.


    (adsbygoogle = window.adsbygoogle || []).push({});

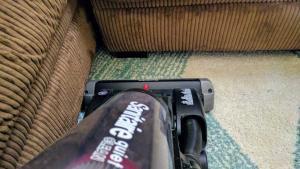
    Finally, all the attachments are put away and the main brush head of the vacuum is used. Just like I used to as a kid when coloring, I outline first, going around the room and furniture. In order to be even more thorough, you may want to move some furniture if you are able to.

    Outline the room, then fill in a slow, methodical manner.
    Outline the room, then fill in a slow, methodical manner.


    (adsbygoogle = window.adsbygoogle || []).push({});

    After outlining, in a very systematic manner, I vacuum the rest of the floor being careful to move at a slow pace–about six inches per second. At this pace, the brush head has a chance to hit each fiber several times while suctioning, making for cleaner carpet.

    Happy vacuuming!

    Click here for more tips on how to clean for better health.


    (adsbygoogle = window.adsbygoogle || []).push({});

  • San Diego Hepatitis Outbreak Needs A Different Solution: Here’s Mine

    San Diego Hepatitis Outbreak Needs A Different Solution: Here’s Mine

    How To Solve The San Diego Street Hygiene, Hepatitis Problem

    Since I previously highlighted what’s wrong in San Diego’s hepatitis remedy, I’ll get right to it.

    Step One: Stop spraying bleach everywhere.

    Bleach is toxic and creates too many unwanted issues down the road like:

    • Negative Health Issues – bleach causes cognitive, respiratory and nervous system issues. This is no secrete.
    • Immediate Sanitizing Only – Once bleach evaporates, its sanitizing properties go with it. Recontamination is possible just moments after application of the bleach.
    • Bleach kills everything – Bleach kills the good microbes too. Infection risk rises when an imbalance exists favoring the pathogens. If there are no good microbes left to fight off the pathogens, other serious illnesses can spread.
    • Where Does It Go? – So the city is spraying bleach everywhere. Are they collecting the contaminated water so it won’t go into the storm drain and contaminate the environment?
    • Creating Superbugs – Applying bleach to every surface is only creating the right environment for the creation of other superbugs. See “MRSA”

    Step Two: Buck traditional thinking, apply some “new” science.

    A quick Google search will yield countless alternatives to bleach to kill viruses and other pathogens. Vinegar, for example, can be an effective sanitizer. However, I propose something completely revolutionary: heat and then probiotics.

    Yeah, I said it! PROBIOTICS.

    High-temperature hot water or steam pressure washers are availableir?t=gebego09 20&l=am2&o=1&a=B000FG4GSQ. There would be no need for any chemicals other than what already exists in the city’s tap water, as the heat would destroy whatever is in its path. No chemicals, means a safer remedy and no negative side effects in the short or long term.

    Probiotics For Days

    After applying the steam, come back through with an application of probiotics using an ultra-low volume foggerir?t=gebego09 20&l=am2&o=1&a=B003YKJGZI. This will create a layer of beneficial microflora which will last and protect for several days rather than minutes.

    Some may think a remedy of heat and probiotics is crazy and it won’t work. But tell me, is spraying bleach all over guaranteed to work? Time to try something different.

  • Healthy Probiotic Cleaning: How To Clean Your Toilet Like A Pro

    Healthy Probiotic Cleaning: How To Clean Your Toilet Like A Pro

    In this post and many more to come, I will share with you the knowledge I’ve gained over the past decade so you can clean better, feel better, and live a healthier life. I will always stress the use of nontoxic cleaners, methods and means to achieve great results without the negative side effects from harsh chemicals. Without further adieu, let’s get started with Healthy Probiotic Cleaning.

    Tools Needed For Healthy Probiotic Cleaning In Your Bathroom

    • Microfiber cloth (x2) – the thicker, the better. Thicker cloths tend to pick up dirt better and can more easily mold into corner and crannies where fingers can’t go.
    • Chrisal Probiotic Cleaner – by far the best product I’ve ever worked with. It’s organic, hypoallergenic, contains probiotics to clean and reduces ATP, lasts for days rather than seconds, extremely effective and a little goes a long way (dilution ratio 1 part :32 parts water ). Healthy probiotic cleaning at its finest. If you don’t have it, use another natural cleaner or a splash of vinegar in the commode.
    • Toilet brush – nylon bristles or sponge-head brushes work best. Try to stay away from wire brushes as they can scratch surfaces pretty easily.
    • Spray bottle – cheap spray bottles are available, but will break on you after a few uses. Splurge and buy one here or at your local home improvement center for a couple bucks.

    Watch my video on how to clean your toilet like a pro

    The Healthy Probiotic Cleaning Process

    Now that you have your tools:

        • remove the trash from around the toilet and set the bin just outside the bathroom – be sure to empty the trash. A full trashcan next to a clean toilet isn’t a good look. If you’re looking for eco-friendly liners, I recommend Bio-Bags. They don’t rip and tear as easily as some other brands I’ve tried. If you just went shopping, use one of the plastic bags your stuff came in. That way it can at least get reused once before it clogs up the landfill.
          • The reason for setting the trashcan outside of the bathroom is twofold: it gives you space to work and it signals to others in the household that work is being done in the house possibly inspiring a member of the household chip in elsewhere.
        • spray your natural cleaning solution in several places:
          • top of toilet tank
          • front of tank and handle
          • toilet lid and seat
          • toilet rim
          • into toilet water
          • base of toilet
          • onto floor next to toilet especially in the corners
        • use toilet brush to scrub inside of toilet and rim
          • be sure to get the underside of the rim. That’s where a lot of crud lurks.
        • with microfiber cloth #1, wipe down toilet
          • start from the top of the tank working your way down to the bottom hitting the rim and base along the way
        • spray cleaning solution on microfiber cloth #2 and wipe bathroom door handles and floor surrounding toilet
        • hard water stains present? Learn how to remove hard water stains non toxically.

    That’s it for the toilet and its surrounding area. Typically, I would reserve the entire bathroom floor for cleaning as the last step of cleaning the house. Knowing the floor around the toilet has already been cleaned makes the ensuing mop up much easier. More on that in a following post.

    If you feel this post has been of value to you, please share it with your friends, family, children, coworkers or anyone else who could benefit from a little extra knowledge.

  • How To Remove Hard Water With A Pumice Stone

    How To Remove Hard Water With A Pumice Stone

    Hard Water Removal from Toilet (Video At End)

    In this video I show you how to remove hard water spots from your toilet with a pumice stone. No chemicals lingering around to negatively impact your health.

    After answering this question on Angie’s List and posting the video, one person commented saying that a pumice stone is the “WORST” thing you can use in a toilet. They pointed to the potential for scratching and gouging–which does exist. However–and I can’t stress this enough–if you use it properly, keep it wet, and apply light even pressure you should be fine (particularly when using on real porcelain as opposed to a light porcelain / enamel-like coating.

    Since I felt compelled to respond and further explain my position, my response was as follows:

    “The classification as “WORST” recommendation is an extremely subjective one and does not apply in this case. However, I do concur with LCD to an extent. I don’t own nor represent Pumie. I’m simply providing a non-toxic solution as opposed to offering a chemical laden approach.

    If pumice stone is used improperly (i.e. not keeping it wet), then for sure you will have scratches all over the place. However, used properly, the porcelain surface (if truly porcelain) will survive scratch free. Any enamel coated surface will not be able to stand up to the pumice

    If you are one to use chemicals to rectify cleaning situations, then by all means go ahead and poison the air the you breathe. Hopefully you don’t suffer from any respiratory issues or have an allergic reaction to the chemicals you are treating with, have little kids that may play in the bathroom too much, or have any pets that drink out of the toilet.

    Any chemical cleaner in your toilet is going to do a few things:

    – interact with other chemicals in your water

    – leave behind VOCs for several days

    – most will contain a bleaching element which will simply turn colors “translucent” rather than actually remove what’s on the surface. This means solid buildup happens faster and you have to clean it more frequently. Cleaning more frequently with chemicals places you at further risk of suffering from their effects.

    Pick your poison (pun intended) or simply use the pumice stone properly.”

    The full comment thread can be found here.